Make up

The best solution to your problems with make up

Long hair

This is where your long hair becomes wonderful

Short hair

Your short hair is your best weapon

Wednesday 25 June 2014

How to fake a nose job using makeup


Crooked Bridge
A crooked bridge is a very common issue with noses. The bridge can be crooked, sometimes symmetrically and sometimes asymmetrically. Now, anything that you darken on your face will recede, so the trick is to apply a darker cream or liquid foundation or concealer along the sides of your nose where the bone or cartilage sticks out, making the nose appear crooked. With these darker impressions, you can create the illusion of a more slim appearance. I like to start the lines where my eyebrows end and follow the curve down the sides of my nose, then blend it out for a more natural appearance.


A “Hanging” Nose
This is another common issue! Sometimes it bothers people when the tip of the nose dips down too low. No biggie! Just apply the contour color under the tip of your nose between your nostrils and blend out. It’s that simple. The darker shadow will ‘lift’ the nose; it’s one of the easiest and quickest tricks!


A Bulbous Tip
The tip of the nose is always a point of focus, and thankfully it’s really easy to contour. Just apply the darker contour shade along the sides of the nostrils, but bring the color in toward the center of the nose to create the illusion of a narrower tip. Examine the width of the area between the bridge of the nose and use this as a guide for how much area to cover with the contour shade. Blend out and you’re ready to go!

How to get those smokey eyes


1 - Brush a medium brown shade onto the outer lid and the bottom lid and into the crease.
2 - Brush a green shade onto the middle of the lid and to the inner corner.
3 - Use it half way under the eye
4 - Use deeper brown to darken the outer corners
5 - Line the upper lids.
6 - Line the waterline with white or nude eyeliner and rap it up with mascara

How to get the perfect eyeliner

1. Concealer keeps liner in place all day.

2. Tightlining is good for those who don’t want to look too “done.”


3. Use white liner to open up your eyes (literally) in all sorts of ways.

4. Keep your waterline eyeliner from running or disappearing during the day.


5. Get a perfect wing with ease.


6. For a more toned-down look, try this teensy flick.


8. Use eyeshadow and an angled brush for a softer look.


10. Once you’ve got one of those techniques down, you can get a bit more colorful.


12. Combine powder and pencil for a sultry, smoky effect.


13. Get glittery.


And FINALLY perfect a heavier cat eye.


Tuesday 24 June 2014

Short Hair Styles for Mature Women


Hairstyles for Older Women: For all three styles pictured above, begin with freshly washed and towel dried hair-apply your favorite holding product i.e. gel or mousse and work through to ends to distribute product evenly. Comb hair into place with everything going in the direction you want it and allow to dry. Allowing hair to dry naturally or under a hood type dryer is best, although a blow dryer may be used if necessary-but the less heat you apply to your locks the better.


For a fuller, longer Pixie type cut such as Caroline Manzo’s pictured at left above-with fullness in the crown, more of a traditional look-for the office. You will use a medium barrel curling iron or medium sized hot rollers and wrap the crown area backward, the sides and back of hair down. Direct your bang area down over forehead. Spray all lightly with hairspray, and allow to dry completely.
Once dry, fluff with your fingers and backcomb (tease) with a pick where needed and use a bit of texturizing putty if desired to pull a few pieces in toward face and/or define bang.


If you are looking for that “mussed” look, for your short Pixie , such as shown in the center photo of Halle Berry- Use a texturizing product such as a putty and really get in there and have fun pulling your hair up in the crown, up and over to one side, a funky little bang, some fringes around your face. Just whatever you feel would look great, for a fun and flirty change!

Look to sexy Sharon Stone, for a sassy, sultry look. Just apply a styling spray with medium to extra holding ability to the root, holding strands up until they stiffen. Once you achieve the height you want, wind things up with an extra hold finishing spray or texturizing putty. When everything is in place just where you want it-give it all a good spray and Voila’, you are ready for that special occasion!

Short Curly Hairstyles

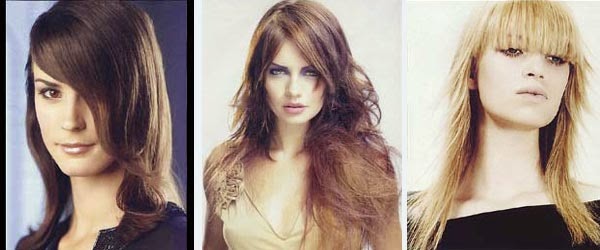
January Jones is stunning in romantic curls or luxurious waves fit for a Hollywood Starlet of the 1940s. For a fun, flirty- romantic look you might want to go with the curls. This would be good for an evening out or a wedding or other festive occasion. For a more elegant, sultry or refined look finger waves are a good choice. Something to be considered when deciding on which look to go with is your choice in clothing and the general “feeling” you are trying to achieve with your overall look. Make up also makes a big difference in the appearance you are looking for. Such as the Smokey eye and Dramatic lip in the above photo of January Jones wearing Waves.
To achieve these looks at home, begin with freshly washed hair-towel dry to remove most of moisture and apply holding product such as gel or mousse, work through hair to ends. Make a side part, usually your natural part is a good place to put the part. Dry hair completely. Next, for the curly style- use a medium barrel curling iron taking a ½”- 1” section and apply a “spring curl” or “ringlet” all over head. Apply hairspray lightly and allow drying. Fluff curls with fingers and/or comb curls out carefully in order to retain the shape of the curl. Once desired look is achieved, apply Hairspray to hold.


1. Begin with damp hair, not dripping – comb through the hair with a wide toothed comb and apply a good gel, again combing through to ends to distribute product evenly.

2. Part hair on side; place your index finger about an inch below and parallel to part-the tip of your finger should be right at your forehead. Using a fine-tooth comb, place the ends of the “teeth” next to your finger. Drag the comb against your finger, pulling all the hair below it toward your forehead creating a “ridge”. Flatten the comb against the section of hair without lifting it from your hair and place your index finger and middle finger around the ridge you just created, and apply pressure to hold shape in place as you proceed to step

3. Comb the hair below your finger sharply back in the opposite direction so it creates a sort of backward “C” shape. At this point, you should see a “ridge” in the direction of your forehead and a backward “C” in the other direction both of which form an “S” pattern. This is your first full finger wave! If you do not see the shapes as described above, you probably did not apply enough pressure.

4. You will now position your fingers about two inches below the wave you just made-you are now ready to form your second wave, beginning with applying pressure with your index finger as in step 2. Repeat steps two and three for the rest of the current section until the desired look is achieved. You should then proceed to the next section, which is behind the one you just finished. You are now ready to apply any other finger waves you desire in order to finish your style.

5. Let your hair dry naturally or under a hood dryer to lock in those soft 40s waves. Comb them out carefully for a soft profusion of waves, or just spray them with hairspray to create a more defined look.

These are just two of the great looks for curly hair, to get the curly or waved look on very short hair simply apply gel, comb hair back- staying very close to scalp, and put your curls or waves in your bang area on one side of your head as in the picture above.


Pixie style is not for you? Think again

Have you ever tried the pixie cut? Is the short pixie cut for you? Check out these pictures for different ways to wear pixie hair styles. Depending on the cut, the look can be boyish or ultra feminine. Extra length in the bangs or at the crown create more styling options to play with. Check out these pixie cut pictures to find your next short hairstyle!


For a super feminine short hairstyle, try this cute pixie with bangs. More hair to play with makes this a versatile look – you can style it smooth for everyday, add some tousle for the weekend, or bring on the height for a special event. This is also one of the best pixie cuts for round faces. The longer hair and bangs can be styled to add height at the crown, elongating the face. Check out some pictures of Ginnifer Goodwin for inspiration.


The pixie cut puts your face front and center. From the side, this cropped cut emphasizes the angle of the jaw, cheekbones, and line of the neck. Play up the feature of your choice with earring, blush, or a statement necklace. Some length in front of the ear and at the neck adds feminine softness to this boyish cut.


Hair can be personalized even with the short length of a pixie cut. From the front, short bangs are worn at an angle across the forehead. A bit of length at the crown is worn tousled for some playful height. Another ket to this look is maintaining groomed brows. If you love these styles, why not try it this season?

Sunday 22 June 2014

S-BRAID HAIRSTYLE FOR YOU TO MAKE

To make this curved or s-braid hairstyle first you have to part the hair from front. Then starting from one side make a thin braid and as you reach almost to the ear length start taking tresses with gaps from the other side and complete a curve. Then take tresses from the side where you started and again make a curved braid. You can make as much curves as you want depending upon the length of your hair. You can pull off this hairstyle for a party or a wedding. It is so beautiful already that you don’t even need to add any hair accessory to it.


Chignon with Braid Hairstyle


To make this hairdo first you have to tie tresses of your hair from both sides. Then make a ponytail from the hair in the middle. Part the ponytail in half and do backcombing in the lower part. Cover it with the upper part. Then tie the end as shown in step 7 and form a chignon. Curl and secure both the ends of the chignon with bobby pins. Then make braid from the tress at one side, bring it towards the other end of the chignon and secure with a bobby pin. Repeat the same step on the other side and your hairdo is ready. 

SIDE BRAID HAIR - LOOKS GREAT ON A BRIDE

To make this hairstyle first you have to fasten the hair from your crown with a bobby pin in the middle like in step 1. Then make a simple braid from a tress coming from one side as in step 2. Continue this braid to the diagonally opposite side and by taking tresses from the opposite side keep on making the braid as shown in step 3, 4 and 5. Finish the braid with a rubber band at the tip and embellished this hairstyle with hair clips matching your wedding dress.
 

DOUBLE WATERFALL TRIPLE FRENCH BRAID HAIRSTYLE


If you are ever-ready to try different hairstyles then you will surely love to give this hairstyle a whirl. To make this beautiful and unique updo first divide your hair in three parts and make a French braid with the middle part leaving tresses at both sides. Secure the braid with a bobby pin. Then make French braids on both the sides by using the tresses left from the middle braid. Secure them too with bobby pins. In the end make a bun from the remaining hair and your hairdo is ready.

HIGH PONYTAIL WITH SIDE MESH - you can do this at home


To make this hairstyle first you have to make a ponytail from half of your hair. Then make 3 small ponytails at one side of your head. Split the first small ponytail and tie its one part with a rubber band to the upper hair and second to the split upper part of the second small ponytail. Do the same to the second small ponytail and keep on repeating these steps until a mesh is ready. Make a ponytail from the lower hair left untied. Split the first ponytail in middle and bring out the lower ponytail from it as shown. Your supper classy hairdo is ready. 

Woven Braid Around Ponytail


To make this hairstyle first you have to make a ponytail while leaving a triangular section of hair at front. Then start making a braid by taking tresses from the front hair and the ponytail and finish a curve. When the curve of the braid is finished keep on making the braid till the end of the hair left untied. Wrap and join this braid with the open end of the braided curve and secure with a bobby pin. This hairdo will be ideal to try for a party or bridesmaids too can pull it off.